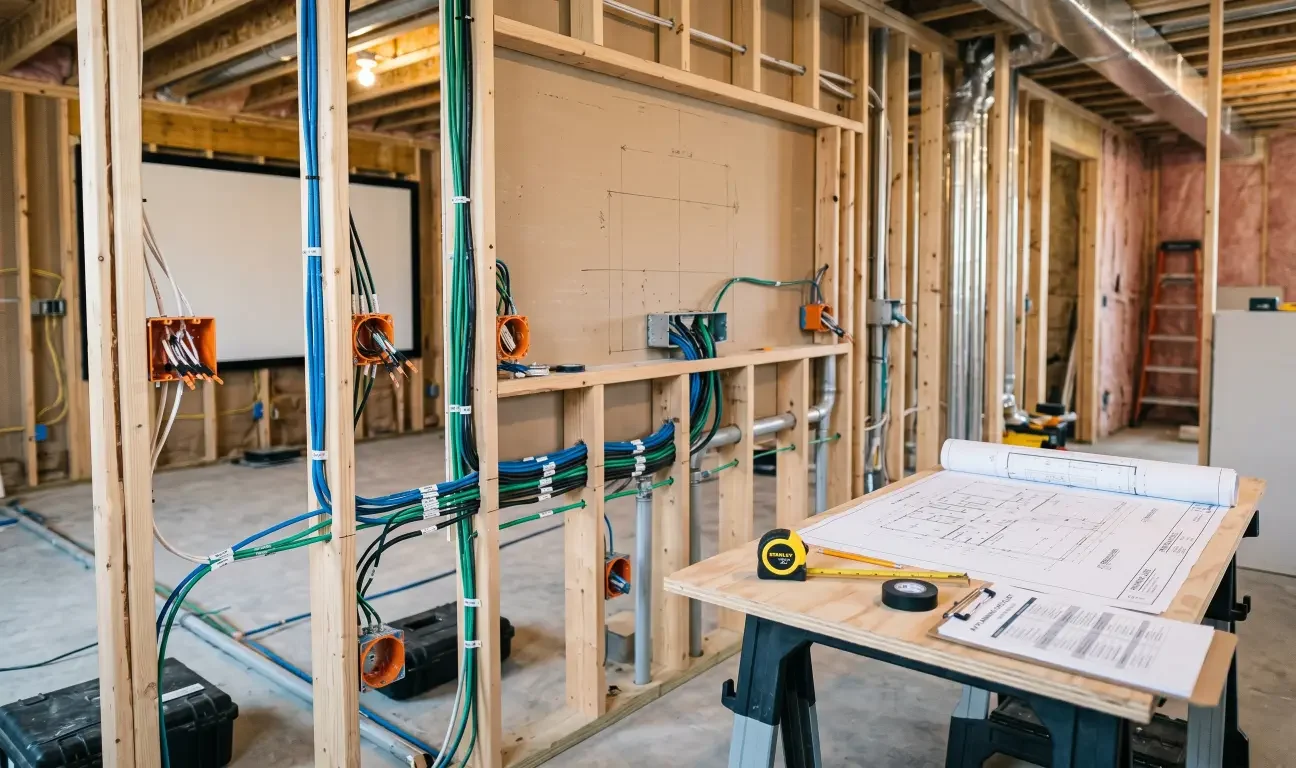
A dedicated theater or high-end media room can look simple once it is finished: a screen, speakers, comfortable seating, clean lighting, and one easy control experience. The hard part is that many of the decisions that make the room work are hidden behind walls, ceilings, millwork, and trim.
That is why home theater wiring mistakes are so expensive to fix later. A missed conduit path, poorly placed outlet, undersized speaker wire, or forgotten network drop may not seem urgent during framing. But once drywall is finished, stone is installed, cabinetry is built, and paint is complete, small planning gaps can turn into invasive rework.
For general contractors, remodelers, and homeowners, the goal is not to predict every future device. The goal is to create a wiring and infrastructure plan that supports the theater system, protects the finished space, and leaves practical upgrade paths for the future.
Why Home Theater Wiring Needs to Be Planned Before Walls Close
A home theater is not just a TV and speakers. It is a coordinated system that may include video sources, an AV receiver or processor, amplifiers, speakers, subwoofers, a projector or display, lighting control, motorized shades, network equipment, control wiring, ventilation, and power locations.
Many of those elements affect construction. Speaker locations may need blocking or back boxes. Projectors need power, signal paths, throw-distance planning, and ventilation. Equipment racks need space, cooling, network access, and cable routing. Seating layout affects screen height, speaker angles, riser locations, and outlet placement.
If the AV plan waits until after finish-out, the room may still be usable, but it often requires compromises: visible wire, awkward equipment locations, expensive wall fishing, weaker speaker placement, or a system that cannot be upgraded cleanly later.
Mistake 1: Treating HDMI Like a Permanent In-Wall Cable Plan
HDMI is important, but it should not be the only plan for a finished theater. HDMI standards, cable requirements, video bandwidth, gaming features, projector inputs, and source equipment change over time. A cable that works today may not support tomorrow’s display, refresh rate, HDR format, or source layout.
The expensive mistake is burying one HDMI cable in a finished ceiling or wall with no practical way to replace it. If that cable fails, is damaged during construction, or becomes obsolete, the fix may require cutting into finished surfaces.
A better approach is to plan a serviceable path. In many theater projects, that means conduit from the equipment location to the projector or display location. The conduit should be planned with realistic bend radius, accessible ends, and enough size for future pulls. The exact design should be coordinated with the AV integrator and the contractor before drywall.
Mistake 2: Forgetting Conduit to the Projector or Display
Projector locations are one of the easiest places to underplan. The projector may need signal wiring, control wiring, network, and power nearby. If the ceiling is finished without conduit or access, future changes become much harder.
The same logic applies to large displays, recessed TV niches, and fireplace or millwork installations. Once stone, cabinetry, or specialty wall finishes are installed, adding or replacing a cable can become disruptive and expensive.
Conduit does not solve every design problem, but it gives the room flexibility. It can create a future path for new video cables, control wiring, fiber, or other low-voltage needs as equipment changes.
Mistake 3: Placing Outlets After Equipment Locations Are Already Fixed
Power planning should follow the theater design, not the other way around. A projector location, display wall, equipment rack, subwoofer position, motorized seating layout, and lighting control plan may all require specific power coordination.
One common mistake is placing outlets based on a generic room layout before the AV design is finalized. Later, the installer discovers that the projector outlet is too far away, the display outlet sits in the wrong part of a recessed niche, or the equipment rack does not have enough dedicated power.
Electrical work should always be handled by qualified electrical professionals and local code requirements. From an AV planning standpoint, the important step is coordination. The contractor, electrician, and AV integrator should confirm where equipment will live, what needs power, what should remain accessible, and what should not be hidden permanently behind fixed finishes.
Mistake 4: Underplanning Speaker Wire and Speaker Locations
Speaker wire is inexpensive compared with finished-room rework, but speaker placement is often treated too casually during construction. A theater speaker plan should account for screen size, seating rows, ear height, surround placement, height channels, room dimensions, and future audio formats.
A common mistake is pulling wire to rough approximate locations without confirming the final seating plan. Another is using wire routes that make future speaker changes difficult. Long runs, in-wall conditions, and amplifier locations should be considered before choosing wire type and routing.
For premium rooms, builders should also consider whether the design needs in-wall or in-ceiling speaker back boxes, blocking, acoustic treatments, or speaker locations that must coordinate with beams, soffits, HVAC, lighting, or decorative ceiling details.
Mistake 5: Skipping Subwoofer and Tactile Bass Planning
Subwoofers are often placed wherever they fit after the room is finished. That can work in simple rooms, but high-performance theaters benefit from earlier planning. Subwoofer locations affect bass consistency, furniture layout, wiring, power, and sometimes acoustic treatment.
If the room may use multiple subwoofers, wire and power should be planned accordingly. If the theater includes a riser, platform, or specialized seating, the team should also discuss whether tactile transducers or bass management features need wiring before the platform is closed.
Waiting until furniture is installed may leave only one convenient subwoofer location, even if it is not the best one acoustically.
Mistake 6: Putting the Equipment Rack in the Wrong Place
Every theater needs a home for the equipment. That may be an AV rack, cabinet, closet, mechanical room, or dedicated technology space. The wrong location can create service headaches, overheating, remote-control problems, noisy fans, messy cabling, and difficult upgrades.
An equipment location should be accessible, ventilated, and planned for cable management. It should have enough depth, nearby power, network access, and a clean path to speakers, display, projector, and control devices. If the rack is hidden inside custom cabinetry, the cabinetry must be designed with service access and airflow in mind.
The most expensive rack mistakes happen when the finished room looks beautiful but leaves no practical way to reach, cool, or upgrade the system.
Mistake 7: Ignoring Ventilation and Heat
AV equipment produces heat. Projectors, receivers, amplifiers, network gear, gaming consoles, media servers, and power management devices all need airflow. A sealed cabinet or tight closet can shorten equipment life and create reliability problems.
Ventilation planning is especially important when equipment is hidden for aesthetic reasons. Luxury rooms often prioritize clean design, but clean design should not mean trapped heat.
Before finish-out, confirm how heat will leave the equipment area. In some rooms, that may mean vented cabinetry, active cooling, return air coordination, or a better equipment location. The right solution depends on the room and system design.
Mistake 8: Forgetting Network Wiring
Modern theaters depend heavily on networking. Streaming devices, control systems, smart TVs, projectors, receivers, game consoles, media servers, touch panels, and automation systems may all need stable network access.
Relying only on Wi-Fi in a high-end theater can create frustration, especially when the room has dense construction materials, equipment cabinets, or multiple bandwidth-heavy devices. Wired network drops are often more reliable for fixed equipment.
The prewire plan should include network lines to equipment locations, displays or projectors where appropriate, access point locations, and any control devices that depend on the network. The theater should be planned as part of the home’s broader technology infrastructure, not as an isolated room.
Mistake 9: Failing to Coordinate Lighting, Shades, and Control Wiring
The theater experience is shaped by more than audio and video. Lighting scenes, dimming performance, motorized shades, pathway lights, sconces, step lights, and control keypads all affect how the room feels.
If lighting and shade control are not coordinated early, the homeowner may end up with separate controls, awkward switch locations, or lighting that does not support movie viewing. In a finished theater, relocating controls or adding shade wiring can be difficult.
A strong plan considers how the room should behave: one button for movie mode, separate lighting scenes for cleaning and entertaining, shades that coordinate with screen use, and intuitive controls near entrances and seating areas.
Mistake 10: Designing Only for Today’s Equipment
A theater should work beautifully on day one, but it should not be trapped in day-one technology. Displays, projectors, source devices, gaming systems, audio formats, control platforms, and network requirements will continue to change.
Future-proofing does not mean buying every possible feature now. It means leaving sensible pathways, service access, spare capacity, and documented wiring so future upgrades are possible without tearing apart finished construction.
That may include spare conduit, extra speaker wire where appropriate, additional network lines, accessible junction points, clearly labeled cables, and enough rack space for system growth.
A Pre-Drywall Home Theater Wiring Checklist
Before walls or ceilings close, the project team should confirm the key theater infrastructure decisions. Use this checklist as a starting point:
- Screen or display location is confirmed.
- Seating layout and sightlines are confirmed.
- Projector throw distance and mounting location are confirmed, if applicable.
- Conduit is planned between equipment and projector or display locations.
- Speaker locations are mapped for the intended audio layout.
- Subwoofer locations, power, and signal wiring are planned.
- Equipment rack or cabinet location is confirmed.
- Rack ventilation and service access are planned.
- Power locations are coordinated with the electrician and AV plan.
- Network drops are planned for fixed AV equipment.
- Lighting zones, dimmers, keypads, and scene control are coordinated.
- Motorized shade needs are identified.
- Cable paths avoid future conflicts with HVAC, plumbing, framing, and decorative details.
- All cables are labeled before walls close.
- The system has upgrade paths for future AV changes.
How AVI Group Helps Builders and Homeowners Avoid Rework
AVI Group designs and installs custom home theaters, smart home automation, whole-home audio, lighting, shades, networking, security, outdoor entertainment, golf simulators, and commercial AV systems across the Atlanta area. That broader technology perspective matters because a theater is rarely just one system.
A dedicated theater may need to coordinate with whole-home control, lighting scenes, network infrastructure, shade control, security, and entertainment sources. If those pieces are planned separately, the finished room may feel less polished and harder to use.
AVI Group can help builders, contractors, designers, and homeowners identify wiring needs before finish-out, coordinate equipment locations, plan future upgrade paths, and create a theater experience that blends performance with a clean finished design.
Final Takeaway
The most expensive home theater wiring mistakes usually happen before the room looks expensive. They happen when the walls are still open, the ceiling is unfinished, and the project team assumes the details can be figured out later.
HDMI paths, conduit, speaker wire, outlet placement, ventilation, networking, lighting control, and equipment access are all easier to solve before drywall, stone, cabinetry, and paint are complete.
If you are building or renovating a theater, media room, basement, or luxury entertainment space, bring the AV integrator into the conversation early. AVI Group offers free consultations to help plan the wiring and technology infrastructure before expensive finish-out decisions are locked in.
FAQs
What Are the Most Common Home Theater Wiring Mistakes?
Common mistakes include forgetting conduit, burying HDMI cables with no replacement path, placing outlets in the wrong locations, underplanning speaker wire, skipping network drops, ignoring ventilation, and choosing an equipment location with poor service access.
Should I Run Conduit for a Projector?
In many dedicated theater projects, conduit to the projector is a smart planning choice because video and control cable needs can change over time. The conduit path should be planned before drywall with proper sizing, bends, and access points.
Where Should Outlets Go in a Home Theater?
Outlet locations should be coordinated with the final AV design, including the projector or display, equipment rack, subwoofer locations, seating, lighting, and motorized features. Electrical work should be handled by qualified professionals according to local code requirements.
Do I Need Speaker Wire Before Drywall?
Yes, if the room will use in-wall, in-ceiling, surround, or height speakers. Prewiring before drywall is usually cleaner and less invasive than trying to add speaker wire after the room is finished.
Why Is Ventilation Important for Home Theater Equipment?
Receivers, amplifiers, projectors, game consoles, and network gear generate heat. Poor ventilation can create reliability problems and make equipment harder to service. Equipment racks and cabinets should be planned with airflow and access in mind.
When Should I Bring in an AV Integrator?
Bring in an AV integrator before framing, drywall, cabinetry, electrical trim-out, or specialty finishes are finalized. Early coordination helps avoid rework and gives the room better options for wiring, control, acoustics, and future upgrades.
RELATED LINK: