
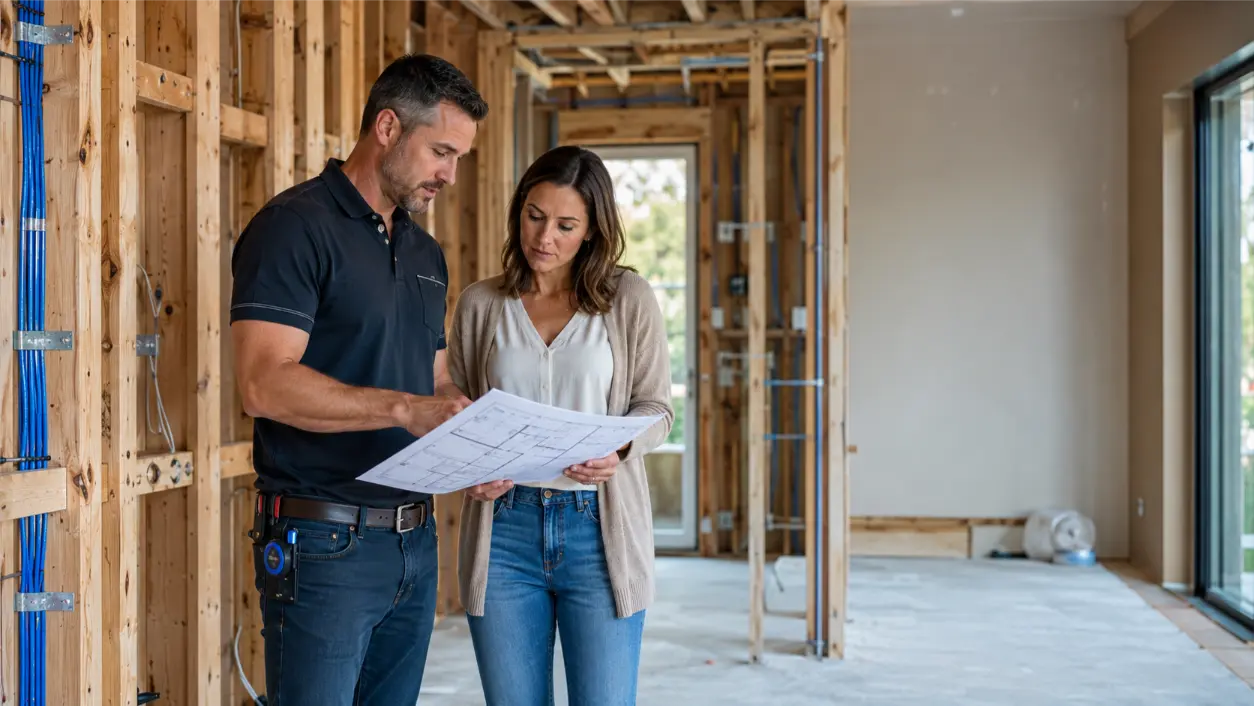
A security system prewire remodel plan is one of the highest-leverage decisions you can make while a renovation is still open. When framing is exposed, it is relatively straightforward to route dedicated cable for cameras, door and window contacts, keypads, network equipment, smart locks, and future devices. Once insulation, drywall, millwork, and paint are complete, the same changes can require fishing wires through finished cavities, opening walls, accepting visible surface raceways, or falling back to wireless devices where a wired connection would have been preferable.
AVI Group designs and installs security, networking, smart-home, and AV systems across the Atlanta area. Its current security and networking guidance emphasizes proper cable paths, labeled terminations, central equipment locations, structured Cat6/Cat6A wiring, and Power over Ethernet for devices such as cameras. For homeowners already opening walls for a major remodel, that makes the pre-drywall phase the right moment to coordinate the security infrastructure with the electrician, builder, low-voltage integrator, door hardware, and network plan.
Why the Prewire Phase Matters
Modern security systems depend on more than cameras. A complete design may involve video surveillance, door and window contacts, alarm keypads, glass-break or environmental sensors, smart locks, video doorbells, local recording, network switches, backup power, lighting integration, and remote control.
Wireless products can be useful, but remodelers should avoid letting convenience during construction determine the long-term architecture. When walls are open, the question should be: which devices benefit from a permanent wired pathway, and where should the supporting equipment live so the system remains serviceable later?
1. Start With Coverage, Not With Camera Count
Before cable is pulled, walk the property with the floor plan. Identify what you actually want to observe or protect: front approach, driveway, garage doors, side gates, rear doors, patio entries, package area, detached structures, or selected interior zones.
AVI Group’s current security process begins with entry points, property lines, interior motion, privacy, lighting, camera angles, recording, and notifications. That order matters because a camera location should be chosen for the view it needs to capture, not merely because a convenient stud bay happens to be nearby.
- What area needs coverage?
- Where can the camera mount without creating an awkward exterior appearance?
- Will the location have a clear field of view after landscaping, lighting, gutters, trim, and future furnishings are installed?
- Does the cable route stay inside protected building cavities as long as practical?
- Will the selected camera be powered by PoE or require another power method?
2. Prewire Camera Locations While Framing Is Accessible
For many modern IP cameras, one Ethernet run can carry both data and power through PoE. CEDIA’s 2026 smart-home wiring guidance identifies PoE as a common approach for cameras and other connected devices, and AVI’s networking service specifically includes managed switching and PoE for cameras, access points, and touchscreens.
Home-run each planned camera cable to the central network or equipment location rather than daisy-chaining camera positions. Leave enough service length for proper termination and final aiming, and label both ends before drywall.
Outdoor cable routes also need to match the final equipment and environment. Camera manufacturers may specify outdoor-rated or shielded network cable for exposed or demanding electrical conditions. The integrator should select the cable type, pathway, grounding/surge strategy, and mounting details for the actual device and location.
3. Decide Which Doors and Windows Need Hardwired Contacts
Door and window contacts are easy to forget because they are small and often invisible after installation. During a remodel, however, the installer can coordinate concealed contact wiring before trim, jambs, and finished surfaces are complete.
Prioritize exterior doors, accessible ground-floor windows, garage entry points, and other openings that are part of the planned alarm zones. Also coordinate with new door hardware. A beautiful new entry door, multi-point lock, or custom jamb can become much harder to modify after it has been finished.
Do not drill or place contacts based on a generic diagram if the exact door or window system has not been selected. The security integrator and door/window installer should coordinate the sensor type and final location so the contact does not interfere with hardware, weather seals, warranty requirements, or finish work.
4. Choose the Alarm Panel and Equipment Location Early
The alarm panel, network switch, recorder, gateway, power supplies, and other security equipment need a deliberate home. Avoid putting critical equipment wherever an empty closet happens to remain at the end of construction.
A strong equipment location is accessible for service but not visually prominent or casually accessible to visitors. It should have appropriate power, ventilation, network access, cable capacity, and enough physical space for the planned system and future expansion.
AVI’s networking guidance favors a central rack with labeled terminations and service loops. Even if the security system uses a separate enclosure, coordinating its location with the main network rack can simplify camera networking, remote access, UPS planning, and future troubleshooting.
5. Coordinate Security With the Network Prewire
Security cameras, video doorbells, app control, remote notifications, and smart-home integrations all depend on network quality. The remodel should therefore treat security cabling and network cabling as one coordinated infrastructure plan.
AVI currently recommends a wired backbone with Cat6/Cat6A runs, strategically placed Wi-Fi access points, central racks, labeled terminations, and PoE switching. CEDIA likewise recommends centralized, documented wiring and encourages homeowners to install conduit and additional cable while access is easy.
- Camera Ethernet home runs.
- Ceiling or wall access-point locations.
- Video doorbell or intercom pathways.
- Network connection at the alarm or automation panel.
- Recorder/NVR location if local recording is part of the design.
- Conduit to difficult exterior or future device locations.
6. Plan Keypads, Touchscreens, and Arming Locations
Think through how the household will actually use the system. Common keypad or control locations may include the primary garage entry, a main living-area circulation point, or the primary bedroom, depending on the system and family routine.
If a touchscreen, keypad, or wall station needs low-voltage cable or power, the box and pathway should be coordinated before drywall. Avoid placing controls where door swings, cabinetry, trim, artwork, or furniture will make them awkward to use.
7. Plan Smart Locks and Entry Devices With the Door Package
Smart locks can be battery-powered, hardwired, or integrated with access-control or automation systems. The correct prewire depends on the exact hardware. During a major remodel, coordinate the lock, strike, door contact, video doorbell/intercom, and any gate or garage access devices together.
AVI’s security offering includes smart locks, access control, video doorbells, door/window contacts, and integrated automation. Treat the front door as one security zone rather than five unrelated products purchased after construction.
8. Add Conduit Where Future Access Will Be Difficult
You do not need to predict every future security device. You do need to identify locations where opening the wall again would be expensive or disruptive.
Conduit or an accessible pathway can be valuable between the equipment room and attic, basement, detached garage, gate area, exterior eaves, or other hard-to-reach zones. CEDIA’s current wiring guidance specifically recommends conduit and thorough documentation as part of future-ready smart-home infrastructure.
Empty conduit is not useful if nobody knows where it goes. Document endpoints and keep pull strings where appropriate.
9. Photograph and Label Everything Before Drywall
Before insulation and drywall hide the low-voltage work, photograph every wall and ceiling that contains security wiring. Capture wide shots that show room context and closer images that show cable position relative to studs, windows, doors, and electrical boxes.
Then confirm that every cable is labeled at both ends. Record camera names, door/window zones, keypad locations, conduit paths, and rack terminations. CEDIA’s 2026 guidance emphasizes labeling and documentation because they make future changes and troubleshooting much easier.
10. Leave Service Loops and Avoid Over-Tight Cabling
Final devices rarely land at the exact millimeter imagined during rough-in. A reasonable service loop gives the installer flexibility to terminate, reposition, and service the cable without splicing.
At the same time, low-voltage cable should not be crushed, sharply kinked, or tightly stapled. The installer should use appropriate supports and preserve bend radius according to the cable and manufacturer requirements.
11. Coordinate With High-Voltage Electrical Work
Security, networking, and AV cable are low-voltage systems, but the remodel also includes line-voltage electrical work. Their pathways, boxes, grounding, surge protection, and equipment power need coordinated planning.
Do not improvise clearances or share pathways that are not permitted. The low-voltage integrator and licensed electrical contractor should coordinate applicable code, separation, grounding, power, and surge-protection requirements for the project location and equipment.
12. Do a Pre-Drywall Security Walkthrough
Before the walls close, conduct a final walkthrough with the homeowner, builder, and integrator. Use the actual floor plan and verify each planned device location in the field.
- Every camera location and cable run.
- Exterior door and selected window contacts.
- Alarm panel and network-rack location.
- Keypads and touchscreens.
- Video doorbell and gate/garage pathways.
- Conduit routes and pull strings.
- Power and PoE requirements.
- Labels, documentation, and photographs.
- Future spare cable in high-value locations.
Security Prewire Remodel Checklist
- Mark security goals and coverage zones on the floor plan.
- Select likely camera viewpoints before cable routing.
- Home-run camera Ethernet to the central equipment location.
- Coordinate PoE switching and recorder/network requirements.
- Identify exterior doors and windows that need wired contacts.
- Coordinate contacts with final door and window hardware.
- Choose the alarm/security equipment location early.
- Plan keypad, touchscreen, doorbell, lock, and access-control locations.
- Add conduit to areas that will be difficult to reach later.
- Coordinate low-voltage work with the electrician and builder.
- Label both ends of every cable.
- Photograph all rough-in before insulation and drywall.
- Document conduit paths, spare cables, and equipment-room terminations.
- Complete a final pre-drywall walkthrough.
Frequently Asked Questions
What Should Be Prewired For A Security System During A Remodel?
Common candidates include IP camera locations, door and window contacts, alarm keypads, video doorbells, access-control devices, network connections, recorder locations, and conduit to hard-to-reach future zones. The exact plan should be based on the property, equipment, and household priorities.
Should Security Cameras Be Wired Or Wireless During A Remodel?
If walls are already open, wired network connections are often worth planning for fixed cameras because they can provide a permanent data path and, with compatible equipment, PoE. Wireless cameras may still have a role, but the decision should be intentional rather than a workaround for missing cabling.
Where Should The Alarm Panel Be Located?
Choose a serviceable, secure, ventilated location with appropriate power and connectivity. It should not be casually accessible to visitors, and it should coordinate with the network and automation equipment where useful. Final placement depends on the system and home layout.
Is It Worth Running Extra Cable During A Remodel?
Often, yes—especially to locations that will be expensive to reach once finished. CEDIA recommends planning for future needs with additional cable, conduit, labeling, and documentation. The integrator can identify which spare runs provide meaningful flexibility rather than adding cable everywhere without a plan.
When Should The Security Integrator Be Involved In A Remodel?
Ideally before rough-in decisions are finalized and definitely before drywall closes. Early involvement allows the security design to coordinate with framing, electrical, network, doors, windows, cabinetry, exterior finishes, and the broader smart-home plan.
Use The Open-Wall Window Wisely
A remodel gives homeowners one brief period when the infrastructure behind the finished surfaces is easy to change. Security cameras, contacts, network pathways, keypads, and equipment locations are much easier to coordinate before the drywall crew arrives than after the home is complete.
AVI Group designs integrated security systems and structured networking and Wi-Fi systems for Atlanta-area homes, including camera planning, proper cabling, PoE, central racks, smart locks, alarms, and smart-home integration. Homeowners planning a major remodel can book a free consultation with AVI Group before walls close so security infrastructure can be coordinated with the rest of the project.
Technical, construction, electrical, and security disclaimer: This article provides general planning information and is not electrical, building-code, cybersecurity, life-safety, or security-engineering advice. Cable types, pathways, grounding, surge protection, equipment power, device placement, code requirements, and installation methods vary by system, manufacturer, jurisdiction, and construction conditions. Use qualified low-voltage, electrical, security, and construction professionals and follow applicable codes and manufacturer instructions.
RELATED LINK: CEDIA — The Ultimate Smart Home Wiring Guide