
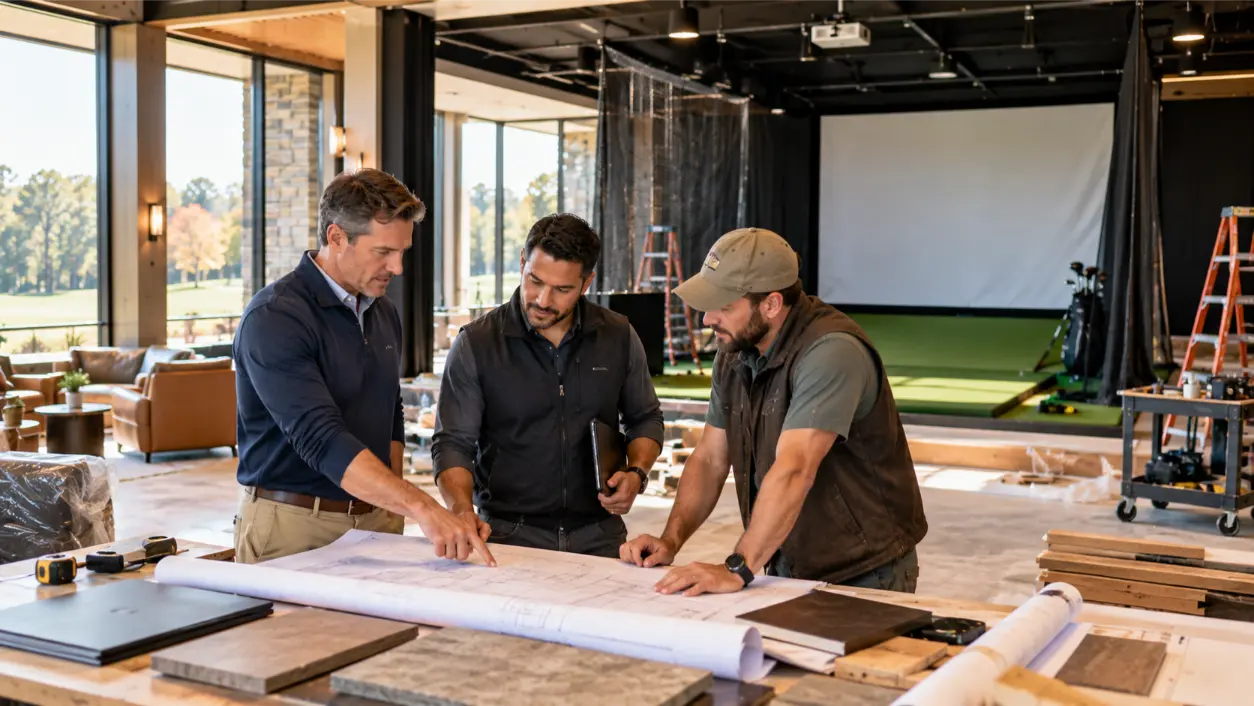
Golf simulator clubhouse planning becomes a time-sensitive facilities project when a golf or country club wants a new simulator ready before its busiest season.
What looks like a single technology purchase can affect room renovation, electrical work, member circulation, acoustic comfort, software setup, and staff scheduling. The most useful starting point is a backwards plan from the desired member launch, with decisions and handoffs documented before equipment is ordered.
For club managers in Atlanta and surrounding communities, the goal is not simply to install a hitting screen. It is to open a reliable, easy-to-operate experience that fits the club’s standards and works for golfers, instructors, guests, and staff. This seven-milestone framework helps keep procurement, contractors, and the member experience aligned. It is a planning sequence, not a guaranteed construction or shipping schedule.
Start With the Member Experience and Work Backward
Before choosing a launch monitor, define how the club will use the room. Will it serve individual practice, lessons and fittings, member competitions, social gatherings, or a combination? A teaching-focused room has different priorities from a lounge that also hosts televised sports and refreshments. Decide whether members can book independent sessions or need staff assistance, and whether guests, left-handed golfers, and multiple skill levels will use the same bay.
Identify an accountable project sponsor, usually someone empowered to approve budget and resolve cross-department decisions. Include the golf professional, clubhouse operations, facilities, finance, and the AV designer in early discussions. The desired opening date should create a decision calendar—not pressure to skip feasibility, inspections, or commissioning.
Milestone 1: Approve the Concept and Project Owner
Translate the club’s vision into a short scope document before a contractor prices the renovation. Record the intended number of bays, simultaneous users, intended teaching features, lounge capacity, expected operating hours, and any potential food or beverage service. Identify whether the space will be dedicated to golf or also support private events, meetings, and other AV uses.
Set a preliminary investment range with separate allowances for building work, equipment, software or licenses, installation, furnishings, staff training, and contingency. Confirm who approves changes and what counts as an acceptable launch. Without this governance, a new display or finish decision can quietly shift power requirements, cabling, ordering, and labor across several trades.
Milestone 2: Verify the Room Before Freezing the Design
Walk the proposed space with the integrator and relevant building professionals. Record clear dimensions, actual ceiling obstructions, beam locations, columns, doors, HVAC supply and returns, sprinkler components, lighting, and the route for bringing large equipment inside. Evaluate the full swing envelope, not only floor area. Left- and right-handed golfers may need different hitting positions or more width, while a waiting group needs space outside the active strike zone.
As a product-specific reference, Trackman’s official simulator specifications list recommended room dimensions of at least 15 feet wide, 10 feet high, and 18 feet deep for its system. Those are not universal minimums. Feasibility depends on the chosen launch monitor, ball-to-screen distance, mounting arrangement, golfer size and swing, and required safety clearances. Confirm the final geometry with the equipment manufacturer and qualified designer before construction.
Plan Circulation and Accessibility Alongside the Swing
Show where players enter, queue, set down clubs, sit, view the display, and move between bays. Avoid routing spectators behind an active golfer or allowing a serving station to overlap the hitting zone. Ask the design team to evaluate accessible routes, seating and operation in light of the club’s circumstances. The U.S. Department of Justice’s 2010 ADA Standards for Accessible Design are an authoritative reference, but the applicable duties can differ by facility and legal status, including whether a genuinely private club exemption applies.
Milestone 3: Finalize Equipment, Sound, Lighting, and Room Details
Once dimensions and use cases are approved, coordinate the simulator as an integrated room. The equipment plan may include launch monitor and mounting, impact screen and enclosure, projector or display, hitting surface, computer, controls, network, speakers, and equipment storage. Product choice affects ceiling mounts, projector throw, light placement, service access, cable routes, and finish details; selecting major hardware only after framing or millwork is finished can create rework.
Sound and lighting for a simulator lounge deserve their own design review. Golfers need enough safe visibility around the hitting area, while a projected screen benefits from controlled glare. Avoid lighting positions that cast shadows or interfere with tracking components. Test whether impact noise and event audio will carry into dining, meeting, or adjacent member spaces. Acoustic treatment, door selection, speaker placement, and appropriate AV zoning may matter as much as the image on the screen.
For a clubhouse with multiple uses, ask how staff will switch between lessons, casual golf, a tournament leaderboard, and lounge entertainment. AVI Group describes custom golf simulator rooms with integrated audiovisual and lighting considerations; the proposed commercial workflow and specific product capabilities should be confirmed during project design. Its commercial conference-room AV experience also illustrates why simple controls, clear audio, and a dependable user interface deserve attention in shared spaces.
Milestone 4: Place Orders After Design Coordination
The golf simulator project timeline for a clubhouse should include a procurement tracker with required-by dates and named owners. Ask suppliers for current lead times on the selected launch monitor, projector, enclosure, impact screen, mounting components, turf, control hardware, and any custom cabinetry. Confirm whether a software license permits the intended commercial or multi-user operation and whether subscriptions, updates, and support are included.
Do not rely on generic shipping estimates or assume a particular system is in stock. Some components may arrive quickly while custom fabrication, imported equipment, or a revised design takes longer. Establish approval deadlines for specifications and substitutions, and define what will happen if a critical item is delayed. For a peak-season target, the practical question is whether the room can be commissioned and staff trained before the launch—not merely whether boxes can reach the loading dock.
Milestone 5: Coordinate Construction and Protect the Installation Window
Planning a simulator room renovation requires a single coordinated schedule across building, electrical, low-voltage, HVAC, flooring, millwork, and AV trades. Confirm when the room will be available for rough-in, when wall and ceiling backing is installed, which surfaces are finished before equipment mounting, and when dust-generating work is complete. Clarify responsibility for power, data, structural support, ventilation, equipment access, and fire- or life-safety coordination.
Use an agreed drawing set and field-change process. For example, changing a ceiling design can affect projector placement or a launch monitor mounting point; changing an entrance can alter circulation and spectator safety. Review site conditions before closing finishes and protect completed surfaces during later installation. Building permits, professional approvals, inspections, and occupancy rules depend on the actual renovation and local jurisdiction; the AV design should not be treated as a substitute for those processes.
Milestone 6: Install, Test, and Run Realistic Member Sessions
Commissioning is more than turning the simulator on. The installer should verify hardware mounting, screen alignment, launch monitor calibration, software operation, network reliability, audio levels, lighting scenes, and controls against the approved scope. Then run trial sessions that reflect expected operations: a right-handed player, a left-handed player where supported, a novice, a teaching session, and a small group waiting its turn.
Test the full member journey from booking or arrival through setup, play, session ending, and room reset. Check whether staff can recover from common problems without opening equipment cabinets or navigating complex configuration menus. Confirm who handles vendor support, account permissions, subscriptions, consumable replacement, software updates, and periodic maintenance. Record unresolved items before the room is promoted for public or member use.
Milestone 7: Train Staff, Soft-Launch, and Open With a Plan
The launch plan should include operations staff, teaching professionals, member services, and any food-and-beverage team involved. Write a short opening and closing checklist, safety and supervision rules, a simple troubleshooting guide, and a process for escalating equipment problems. Decide whether reservations are timed, how instructors receive priority access, and who resets the room between groups.
A soft opening with invited users can reveal practical issues before the first major member event: unclear control labels, crowded waiting space, inconvenient club storage, or sessions that routinely run beyond the booking window. Leave time for adjustments. When marketing an opening date, describe it as confirmed only after inspections, installation, commissioning, and operational readiness have been achieved.
An Illustrative Clubhouse Simulator Project Timeline
Every venue and procurement package is different. Rather than treating the following as promised durations, use it as a sequence of decision gates. Work backward from the club’s preferred launch and request realistic dates from each responsible supplier and contractor.
- Concept gate: Approve member use cases, budget authority, owner, and intended opening window.
- Feasibility gate: Complete room measurement, swing and circulation review, code/accessibility assessment, and preliminary equipment fit.
- Design gate: Approve AV drawings, finishes, lighting, acoustics, utilities, and project scope before ordering.
- Procurement gate: Confirm selected products, lead times, commercial software terms, purchase orders, and delay contingencies.
- Construction gate: Complete trade rough-in, required checks, finishes, and a room-ready handoff to the integrator.
- Commissioning gate: Install and test systems, address punch-list items, and rehearse member sessions.
- Launch gate: Train staff, finalize operating rules, soft-open, and then announce general availability.
Keep a visible risk log beside the schedule. The most important dependencies often include room access, final product approval, inspection status, equipment deliveries, and the staff available for acceptance testing. Review these at a recurring project meeting and record decisions while they are still actionable.
Club Manager’s Pre-Opening Checklist
- Ownership: Named project sponsor, approver, and primary contact for each trade.
- Experience: Defined use cases, bay count, lesson needs, lounge capacity, and booking model.
- Space: Verified swing clearance, safe circulation, entrances, waiting area, and equipment access.
- Technology: Approved launch monitor, screen, projection, audio, network, controls, and software terms.
- Construction: Coordinated electrical, HVAC, data, backing, flooring, lighting, and acoustics.
- Procurement: Confirmed vendor dates, responsibilities, substitutions, and contingency decisions.
- Readiness: Completed testing, required approvals, staff training, operating guide, and soft launch.
Frequently Asked Questions
How early should a club start planning a simulator for peak season?
Start as soon as the target opening window and likely room are known. The required lead time depends on equipment availability, renovation complexity, design approvals, permits, and contractor schedules. Obtain written estimates from the integrator and trades, then include time for commissioning and a soft opening rather than scheduling only around delivery.
What are the main requirements for a commercial golf simulator?
Requirements commonly include a suitable swing and impact zone, protective enclosure, selected tracking technology, display or projector, reliable power and networking, appropriate lighting, safe spectator circulation, and a staff operating plan. Commercial software permissions and facility-specific code or accessibility obligations should be verified before final purchase.
Can a clubhouse simulator room support multiple users?
Yes, if the simulator room design for multiple users accounts for alternating play, left- and right-handed operation where intended, seating, waiting space, clear rules for the active hitting zone, and a simple way to manage profiles or sessions. The design must be reviewed for the actual room and product combination.
Should we purchase equipment before the renovation design is finished?
Ideally, approve the equipment selection and room design together. Ordering before dimensions, mounting, screen geometry, electrical needs, and software scope are verified creates avoidable mismatch risk. Some long-lead purchases can proceed once the necessary specifications and change controls are locked.
What should happen before members can book the room?
Complete the relevant inspections and approvals, installation and calibration, realistic acceptance testing, staff training, usage and safety instructions, and the support handoff. Then validate the booking workflow through a limited soft launch before announcing wider availability.
Plan the Clubhouse Experience With AVI Group
A simulator that fits a clubhouse needs more than a good launch monitor: it needs a coordinated room, a manageable project schedule, and an experience members can use confidently. AVI Group designs integrated golf simulator and AV environments across the Atlanta area. If your club is exploring an indoor golf addition or renovation, book a free consultation with AVI Group to discuss the space, intended uses, technology options, and contractor coordination before committing to an opening date.
Technical, safety, and accessibility note: This article provides general project-planning information, not engineering, architectural, legal, accessibility, or construction-code advice. Equipment clearances and installation methods are product- and site-specific. Have qualified professionals evaluate player safety, structural and electrical needs, permits, inspections, accessibility responsibilities, and all locally applicable requirements.
RELATED LINK: Trackman — Golf Simulator Technical Specifications